
How to visualise your interiors in 6 steps
Something I’ve always struggled with is visualising interiors.
How will that rug look on that floor? How will that chair look in that corner? Will this cushion go with the chair? How can you know these things without carrying your chair around John Lewis Home to match it to the perfect cushion?
Visualising is something I find difficult. I also don’t like making risky choices when it comes to colour or pattern in case I don’t like it. But, I have found a foolproof way of making sure you like something before you buy.
I am not the biggest photoshop whiz in the world. In fact, that’s an exaggeration. I’ve used Photoshop about 4 times in my whole life. All the different options baffle me. But if I can do this, anyone can.
I want to show you how you can edit a photo to include a piece of furniture you’re not sure about, or a light fixture you think won’t match your home.
For me, this is the only sure fire way I have of making sure I’m comfortable with a purchase. Some people have an ‘eye’ for it, and know when they see something. But I don’t, and like to double check I’m right first.
These steps are so easy, I’ll take you through how to visualise your interiors in 6 easy steps.
Step 1: Take a photo of the room
You should take a bright, clear photo of the area you want to buy something for. Try to get the photo as straight as possible, without pointing the camera up or down too much.

I’ve been searching for a lamp to put behind that chair, but had no idea what style to go for. Editing the picture really helped me to decide.
Step 2: Save a Photo of the Item
Next, you should save a photo of the item you’re looking to buy.

I love this tripod floor lamp from John Lewis. I took a photo from their website and saved it.
Step 3 (Important!): Remove the Background
You don’t need any fancy software to successfully remove the white background from an image. You can simply use Microsoft Word.
Insert your picture as below:
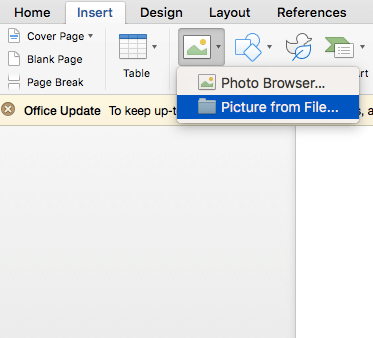
Then, in the ‘Photo Format’ options, select ‘Remove Background’.
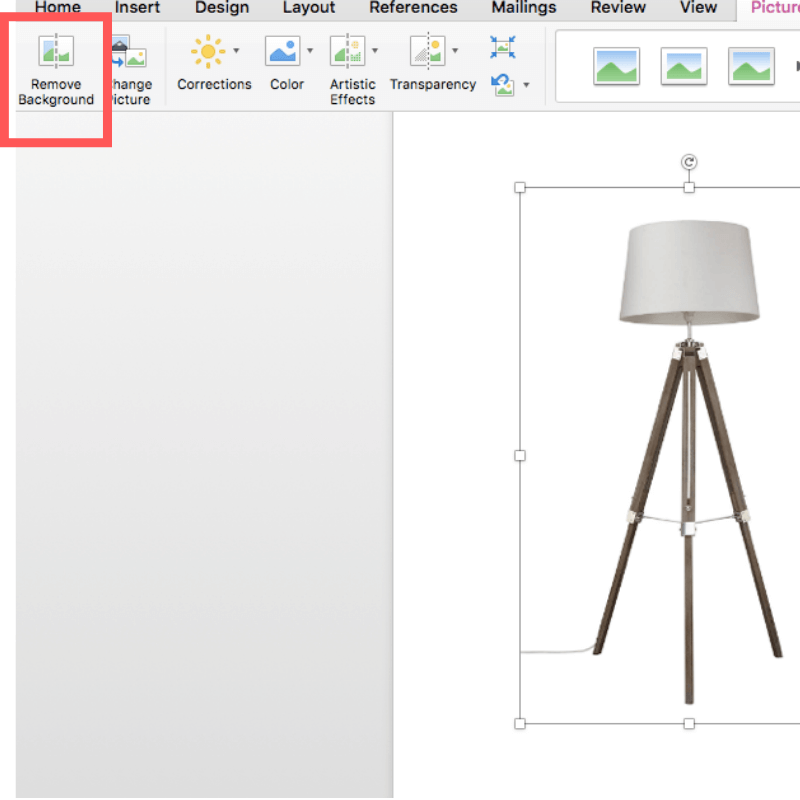

The pink sections are the transparent bit, so anything pink won’t show up in your finished photo. Some smaller details can be tricky to get right, so take your time with it. You can see in my photo, that it hasn’t picked up the very thin parts of the stand. These don’t matter too much.
When you’re finished, select ‘Keep Changes’.
Step 5: Save as a PNG
This step is important if you want to completely get rid of the background.
You can right-click on the image you’ve just removed the background from, and click Save As Picture…

When it asks you what to call it, make sure that PNG is selected, as below:

Step 6: Open Canva and Upload
Now you should have the photo of your room, and a PNG photo of the decor item you want to buy with its background successfully removed.
I use Canva for this next bit, but I’m sure most other softwares could work too. But Canva is free and easy to use.
Upload your two photos: the original and the edited product.
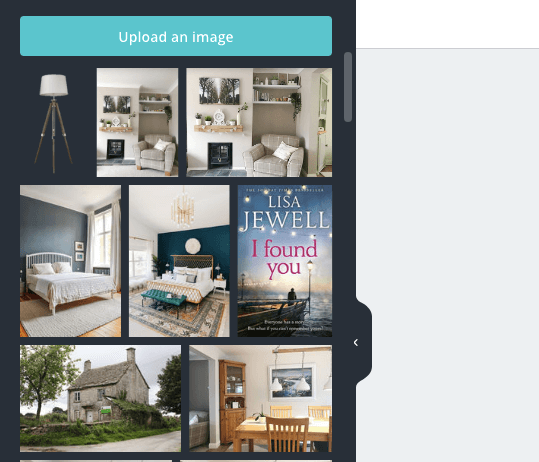
Then select your two images to insert them both:
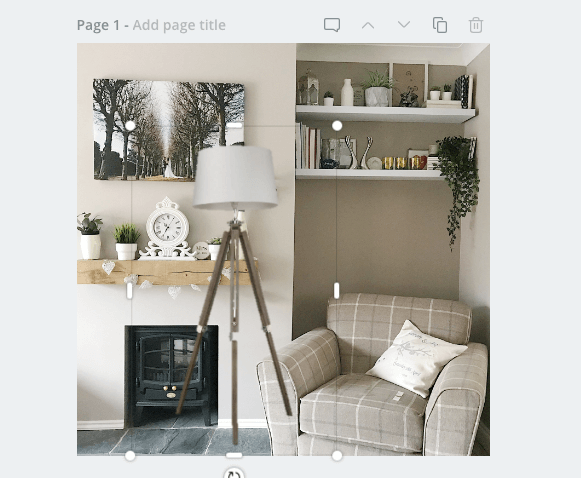
So there’s my lamp in the middle of my living room! The final step is to crop the picture and put it in the right place (and resize if you have to).


It’s not perfect, but it definitely gives you an idea of what something will look like if, like me, you struggle to visualise your interiors. You can try a few different styles too, and decide on your favourite.

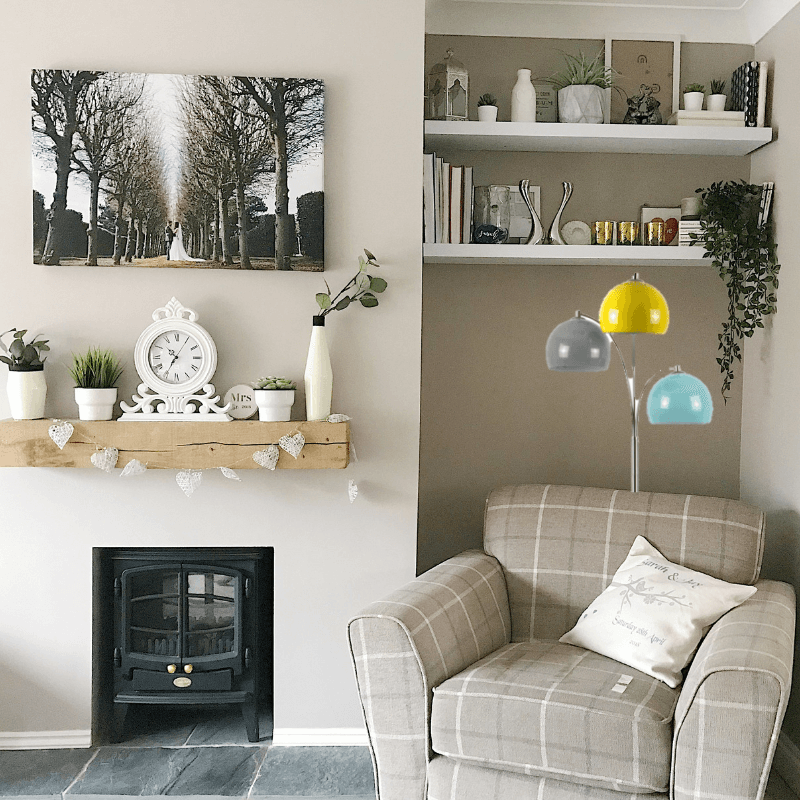
You could try this little trick with lots of things, especially big purchases like a bed, or a sofa. You could take a photo of a blank wall and try to arrange a gallery wall this way, or see if a piece of artwork will ‘go’.
Do you ever struggle to visualise your interiors like I do? How do you get round it?



The Microsoft Word tip is genius. I always thought you needed Photoshop to do that. Thanks for sharing this!
Glad I could help! I always do it in Word, it’s been a lifesaver a few times.