

Tiling our kitchen with Tile Mountain
Ad - this article contains gifted products, provided by Tile Mountain. Opinions are all my own.
We moved into this house in August 2020 (and moving day was certainly touch and go!). When we bought it, there were so many temporary changes we wanted to make, until eventually we could afford to do the gorgeous extension of our dreams.
The kitchen was one of the rooms we wanted to make a lot of changes too. While the kitchen itself is from the 80s, there’s nothing really wrong with it and it’s functional enough.
But I knew I wanted to make some budget changes to make it a better space for us.
Our kitchen – before

This was our kitchen before!
A solid wood 80s kitchen, but in an interesting orange varnish colour. When combined with the orange worktops, orange tiles and red carpet, the room was certainly interesting to say the least.
We had discussed painting it and doing various other things, but not really with a time scale in mind.
Well, fast-forward to December 2021 and we both get hid by the dreaded COVID. So we decided to do what any DIY-lover would do with 10 days of self-isolation ahead of them – do a speedy kitchen makeover of course!
In just 5 days (the first 4 were spent in bed recovering), we achieved what felt like the impossible. We gave each door, drawer and cupboard three coats of paint and replaced the floor.
After our self-isolation was over, this is what we’d achieved.
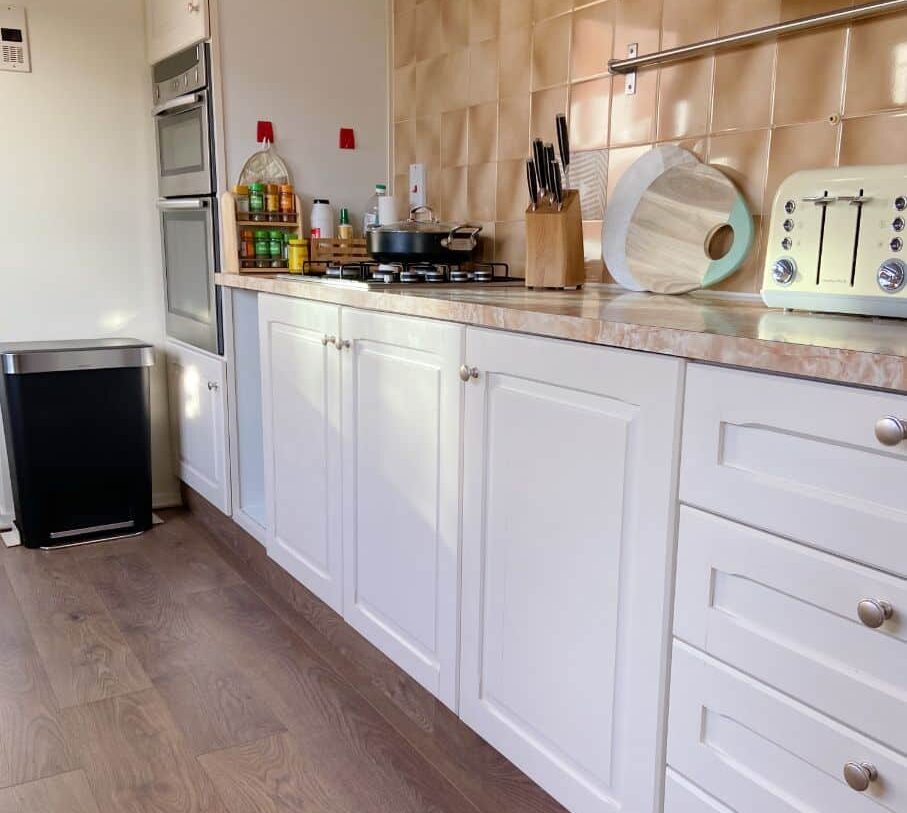
I think you’ll agree it’s much better! But still not finished.
The next task was replacing those tiles, and Tile Mountain very kindly agreed to provide me with the products we needed to get this next stage of the makeover underway.
Tiling our kitchen with the Scale Boho Tiles
I chose the Scale Boho tiles in ‘white’ for this project. I fell in love with their unusual shape, the gorgeous mismatched patterns and the slight orange hues that would tie in with our worktops (which we plan to keep).
These stunning tiles have been designed to look like individual, circular tiles, but they actually come in squares of 9 for easier installation.
Choosing a grout colour

Our one issue with this was that it looks like they already have grout in, but we also needed to add grout around each individual square sheet. This means we had to find a really good, close match to make the design look seamless.
The best grout we found was the Mapei Ultracolor grout in Manhattan (light grey) and we’re really happy with how it has turned out.
We also needed to decide which way we would put the tiles. I preferred to have them facing up, so this is how we installed them.
Cutting the tiles
The tiling itself didn’t take long at all, but absolutely do be wary with these tiles that a standard tile cutter won’t do the job.
We had a manual one, the sort where you scratch a groove into the tile’s surface and then snap it for a clean break. We tried this in various ways on multiple tiles but they never broke in the right place because they aren’t one flat surface. As they’re made to look like individual tiles, they’d end up breaking on a curve, so getting straight lines was tricky.
We purchased a special wet tile cutter* instead which did cut them into the straight lines we needed. Though even this wasn’t the cleanest method, and we found the tiles would have quite jagged edges where we’d cut:

You can see this most clearly in the corner where the tiles meet the edge of the window. It’s not so noticeable now we’ve grouted, but if you have a lot of fiddly cuts to make like we did, these tiles may not be the best. They’d be better suited to a bathroom floor or a wall that doesn’t have a lot of edges/sockets.
Installing the tiles
Once we’d figured out the best method for cutting these tiles, installation was fairly quick and easy. We applied the adhesive mostly to the wall but also partially to the tile and stuck each one on individually. We used a level to ensure they were straight and tiled partially up the wall instead of to the top.
The kitchen – after!
And this is the finished effect!


It’s the close up that really does these tiles justice. You can’t make out the 9-square sheets because the grout is such a perfect match and I love how many pattern variations there are.
As you can see, we’re yet to paint our kitchen, so it’s still very much a work in progress!

With painting and some other bits still ahead of us, the kitchen isn’t finished, but I’m pleased with where we’ve got to with it.
*This guide contains affiliate links, which means I may make a commission when you make a purchase after clicking the link.


